Free Instant Blog Logos


If you’ve already got a blog and you’ve been searching for a cool modern logo to make it unique, I’ve got a great site for you that provides some great free logos in Photoshop format (.psd) which you can easily Edit.

Logo Instant provides some great Free logos in Photoshop format (.psd) which you can easily edit and modify to your Blog \ Web Site. Every day they provide a Brand New Custom Web 2.0 logo.

The motto posted on their website is,”You don’t have to spend big bucks anymore for designer, because this service is 100% free”. That’s something most of you can appreciate I’m sure!

A Way To Improve Google Rankings in Blogger \ SEO

We are going to make a quick edit to your Blogger template. It’s very small and will help to Improve your Ranking in Google (SEO - Search Engine Optimizer).

Firstly Backup Your Template just in case you make a Mistake. That makes it easy to revert back.

1. In Blogger open Layout > Edit HTML.

2. Mark "Expand Widget Template".

3.Search for this code using Find Tool (Ctrl + F).


4. Replace that code with the following code.


5. Save your template.

Now back to your Blog. Click into any individual post and look at the page title !!

Add an Extra Gadget in BLogger.


In this post I'll tell you how to add an extra "Add a Gadget" at the Top of the Header that will help you to add Gadgets in a good looking.

Before any thing, Open Layout in Blogger then Edit HTML and press on Download Full Template so if you made any thing wrong you can Upload it back again.

In Edit HTML, Search for showaddelement. Change showaddelement='no' to showaddelement='yes'. Change maxwidgets='1' in front of the showaddelement to maxwidgets=''. If you have problem looking for the above, press Ctrl+F and search. Save Template after that, Enjoy!

If you have any problem with that, Leave a comment with your question and I will answer you as soon as possible.

For Suggestions, Contact Us!


If you have any Comments, Suggestions, Reactions, or just a Friendly Message, Please Feel Free to Contact. I will try to reply to you as soon as possible, Email me, Thanks.

Adding Votes In You BLogger.

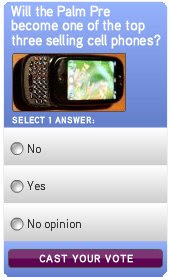
If you’ve already got a blog and searching for a good way to make some votes. In this post we will tell you how to add a Poll (Votes) to your Blog or Web Site !


Follow these simple steps..!

1. First, Sin up in to Vizu.

2. Click On Creat Poll.

3. Type the Information ... What is your poll question? & The Answers ..

4. Choose a categories that describe the poll, Write Keywords for it (At least 1) Then press Next.

5. Type you Site \ Blog URL and the Link Label

6. Press Finish.

7. Press on Export you Poll.

8. Choose the colors and the size and then press on "Get Export Code For This Poll" and Copy the code.

9. Go to your blogger account, Layout > Add Gadget > HTML\JavaScript and past the code.

10. Save the changes, Enjoy!

Search Online for the Best Deals Here.


Search for the Best Deals from Amazon Shopping Online without leaving the page! Have an Easy Shopping!!


How To Change Blogger Tab Icon?


You’ve already got a blog and want to change its Blogger Tab Icon? Check it here and find the way to change it.


Steps:

1. Get a .PNG file with Microsoft Paint (200 x 200) pixels.

2. Uploaded the .PNG file to a website which provide free service on converting .PNG files into .ICO files "Convertico" . Convertico will change the .PNG into an .ICO of 128 x 128 pixels.Save the file using "save image as".

3. I upload the icon file into "Imageboo" . It was easy, since I did not need to register. anything.Copy the direct link for the next step. Don't use Photobucket for this, since they do not support .ICO files. Add this bold tag into the Template. From Edit html in the layout .Put them in head section, between "title" tag and "b:skin" tag. Use Fide Tool (Ctrl + F) to find it.

Download .txt file for the Code

4. Save Changes, Enjoy!

Add Star Ratings Widget To Your Blog

Most of the visitors feel a bit lazy to write a comments,
So with this widget, they will rate your posts as easy as 123.


Outbrain provides some great Star Ratings Widgets for Free, You don't need even registration to get one, Enjoy!

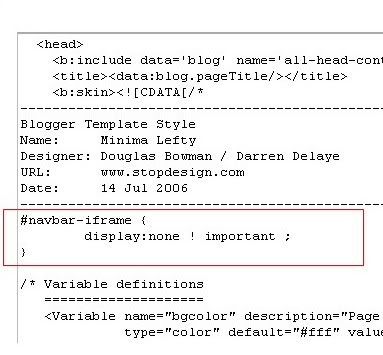
How to Hide The Blogger Navbar.

Most of the people want to remove the Navbar to make the blog looks better. In this post you will learn how to hide, disable or remove the blog Navbar from your Blog. Let's do it with photos to make it easy to understand.


Steps:

1. Sign in to your blogger account, Click the layout button.

2. Click HTML tab as shown in the below picture.

3. Add the below HTML code as in the picture.

#navbar {
height: 0px;
visibility: hidden;
display: none;
}
add the code like this
4. Save the changes, Enjoy!

Charcoal Blogger Template

Charcoal is 3 Columns templates with Left sidebar and Right sidebar, Rounded corners, Brown, Fixed width. Everyone need a template like this for his/her blogger.


Blogger Template Screenshot

Flora Scent Template

Flora Scent is originally a Word Press theme designed by Lorelie of Toptut.com. I saw this excellent theme and decided to convert it to our Blogger beta (xml) template.


Template screenshot

Field of Dreams Template

Field of Dreams Template is very good,professional looking two column blogger template. Originally it was a Word Press theme designed by NotSoBoringLife


How to Install Blog Templates?

Everyday so many readers leaving comments asking "How to install xml blogger templates?".
So, to make it easy, here is the complete tutorial on how to install blogger templates

1.First download the template and unzip the file using Winrar or Winzip. After extracting the file you will see a folder named Images( in case if you lost ) and an xml file.

2.Sign in to Blogger dashboard and click on the layout.

3.Here is the important step, after uploading any new Blogger template, all of the previous widgets like your Google adsense ads, text, profile ,poll, ... etc will be lost.
So, to avoid this to happen, in this step click on 'edit' on all the widgets and copy the codes into Notepad.

backup widgets

4.Next, click on the 'Edit HTML' tab

5.You'll see an option to download the current template, so do it!

6.Just below that,there's an option of uploading new template.So, use the Browse button and upload the downloaded xml file.

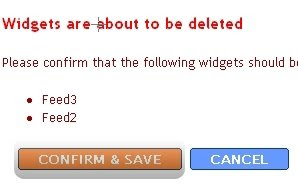
7.Now, a message appear saying that your widgets are about to be deleted.Click on the Confirm & Save.

confirm and save

Now you successfully installed the template !!

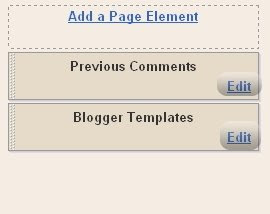
Click on the 'Page elements' page now and add the codes that you copied in step3 using the 'Add a Page Element' option, Enjoy!

How to submit blogger sitemap to Google

This post explains how to generate and submit blogger site map to Google webmaster tools.

1.First,go to Google webmaster tools and sign in with your Gmail account.

2.After you logged in, you will see this asking you to add a site.

Add your blog URL(ex:e-dollarsonline.blogspot.com). (Don't add with HTTP or WWW.)

3.It asks you to verify your site. It is just to confirm whether you are the owner or not.


CLICK on the 'verify your site' link.

Next ...

Choose verification method

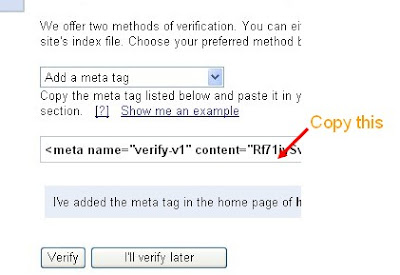
4.There are two ways to verify your ownership but, there is only one way for the blogger users to add a meta tag.


copy the metatag
5.Copy the meta tag.

Sign into your Blogger account > Click the layout button > Edit HTML, Paste the Meta tag just after the head tag and save the changes.


paste the metatag like this
and click the verify button in the Google webmaster tools and there will be a confirmation message saying that you have successfully verified.


conformation message


Now,you have to submit a site map for Google to crawl your site.Go back to the Google webmaster dashboard or (home) and click the 'Add' link which is next to your blog name and in the Site maps column.


Choose 'Add general web site map' from the drop down menu and type rss.xml or atom.xml next to your blog address as shown below


Or


and click the 'Add General Web Site map' button.

6.That's it.Now your sitemap is successfully submitted to Google.

How to add a PAYPAL DONATE button to your Blog \ Web Site

Adding a PayPal donation button to your blog will give your loyal readers a chance to support you by donating a few bucks.
If you don't have one, Get a free one Here

Let's Start ...

1.Log in to your PayPal account.

First,Log in to your Paypal accoun
2.Click on the 'Merchant Services' tab


Click on the 'Merchant Services' tab (see at the top of the page)
3.Scroll down the window and you will see an option called "Donations" in the right sidebar. Click on it!

Scroll down the window and you will see an option
4.Now,you will see some options ...
The first one (Donation name/service) is the only thing that is required and all the remaining fields are optional.
Enter it, Choose you button style,
Scroll down the window and click on "Create a button Now"
click on
5.You will see HTML Code... Copy it and sign in to your Blogger Dashboard » Layout » Add a Page element » HTML/JavaScript » Paste that HTML code.

6.Save the changes

Here is how it will look like in you Side Bar !!


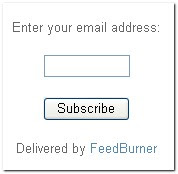
How to add "Email Subscription Form" to your Blog?

It is delevered by FeedBurner.

When people subscribe, they will recieve an email with your blog posts whenever your blog is updated. It is a very and simple thing and make your visitors come back again and again to your blog frequently.

Let's see how to add an "Email Subscription" in your blog ...


1.Sign in to your FeedBurner account. If you don't have one,
Register it Here


2.Click on the "My Feeds" link at the top of the page and then click on your Bblog Name.


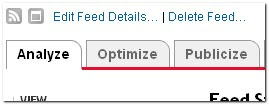
3.Click on the 'Publicize' tab.


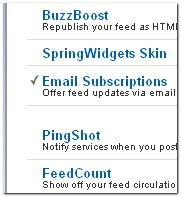
4.Select the "Email Subscriptions"


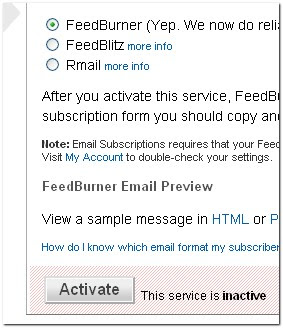
5.Next, you will see like this


Click on 'Activate'

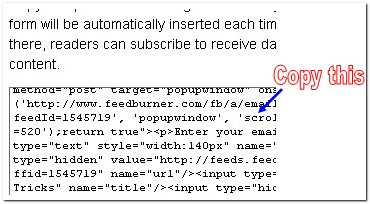
Now,Click on the Subscription Managemant option and copy the code they provide
[*Screen Shot*]


7.Finally, ...

Sign in to your Blog Dashboard > Layout > Add a page element > HTML/JavaScript

and paste the code and Save.

How to add a "Email me" Text link in your blog/webpage?

This post explains how to add an "Email me" Text link in your Blog/Web Page.


how to add email me link

Steps:

Simple! look at the below example.
If your email is some name@gmail.com, Use the Download Link to get the Code....


The output will be like this (Click on it to check)

Email me

And you can change the 'anchor text'(Email me) to your own words like "Contact Es", etc

If you want to add this in your blogger blog sidebar
Do this ...

Sign in to your Blogger Dashboard> Layout > Add a page element > HTML/JavaScript
and paste the code(Don't forget to change the email address in the above code with yours !!)
Save the changes.
Add to My Yahoo!